


How to Install WordPress Plugins From the Official Plugins Directory
The easiest way to install WordPress plugins is by accessing the official plugins directory through your WordPress admin area. However, this WordPress plugin directory is limited to free plugin options only.
Log in to your WordPress dashboard and navigate to Plugins -> Add New. Proceed to search the name of the plugin in the search bar. You can also browse the featured, popular, or recommended plugins by clicking on the provided tabs on the left.

For example, if you search for the MonsterInsights plugin, you will see it come up as the first result. Click on the Install Now button to start the plugin installation.
Wait for the process to finish and click the Activate button to start using the WordPress plugin.
Once you activate the plugin, check and configure the plugin settings by heading to Plugins -> Installed Plugins.
How to Install WordPress Plugins Manually
Another way to install WordPress plugins is by manually uploading the plugin files through your WordPress dashboard.
This method allows you to install a plugin that may not be in the official WordPress directory but available from third-party directories instead, such as CodeCanyon and Codester.
Before starting the plugin installation process, you need to first download the plugin ZIP file from your chosen source.
Next, access your WordPress admin area and click Plugins -> Add New. Then, locate the Upload Plugin button at the top-left side of the page.

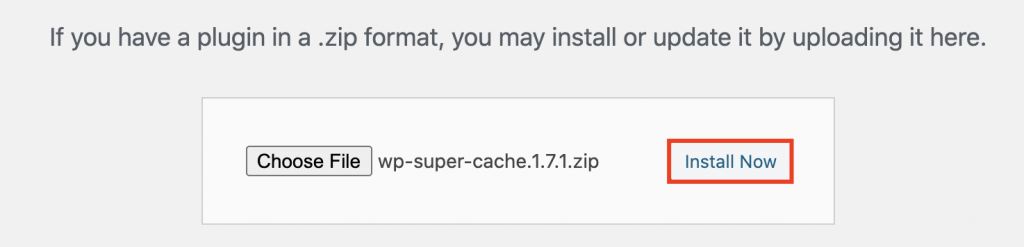
Select the plugin ZIP file from your computer that you want to upload, then click Install Now.
Wait for the plugin installation to finish and press Activate Plugin.

Using an FTP Client to Install WordPress Plugins
There are several premium and custom WordPress plugins that require you to install them manually using an FTP client. For a beginner, the process might be slightly more complicated because you will need to learn how to configure an FTP client first.
Not to worry – the following guide will walk you through the process step-by-step. All you have to do is simply follow the steps.
- First, extract the ZIP file of the plugin and save it to a folder on your computer. Keep in mind that the extracted plugin file folder will be the one you need to upload through the FTP client.
- Then, connect your website to the FTP server. To do so, find the FTP details from your hosting provider.
- Once connected, access your FTP client – for this example, we use FileZilla. There, input your login credentials and press the Quickconnect button. Next, navigate to the Remote Site panel and locate the wp-content/plugins/ folder.
- On the Local Site panel, upload the extracted plugin folder from your computer to wp-content/plugins/ folder on your server.

Once the transfer is complete, the WordPress plugin will be installed on your site.
To activate the plugin, you need to access your WordPress dashboard. Go to the plugin section -> Installed Plugins, locate the plugin, and click Activate.