How to Install Cassandra on Ubuntu 18.04, 20.04, and 22.04
Users can easily install Cassandra with the help of the APT packages manager. Keep in mind that in order to install the latest version of Cassandra you will still need to include its package repository first.
Step 1. Download and Install Java
CLICK HERE
Step 2. Add the GPG Key
To avoid issues with the repository, add the GPG key and increase the security of the repository. First, install wget if it’s not present on the system:
sudo apt install wgetThen, add the primary key with the following command:
wget -q -O - https://www.apache.org/dist/cassandra/KEYS | sudo apt-key add -Step 3. Add the Cassandra Repository File
Add the Cassandra repository to the system’s repository file. To do that, type the following command in the command line:
echo "deb http://www.apache.org/dist/cassandra/debian 40x main" | sudo tee -a /etc/apt/sources.list.d/cassandra.sources.list deb http://www.apache.org/dist/cassandra/debian 40x mainStep 4. Install Cassandra on Ubuntu
Refresh the repositories and then proceed to install Cassandra on Ubuntu:
sudo apt-get update

sudo apt install cassandra -y
Step 5. Enable and Start Cassandra
At the end of the installation, enable the Cassandra service to start automatically when the system boots. In addition, start it manually for the first time with the following commands:
sudo systemctl enable cassandra

sudo systemctl start cassandra
Step 6. Verify the Installation
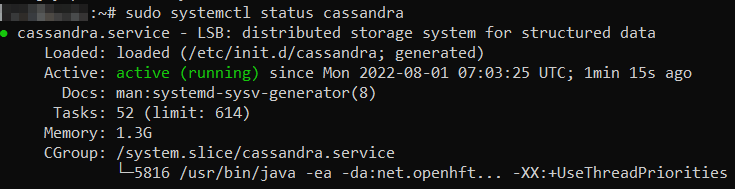
To check if the installation has been successful, check the status of the service. To do this, run the following command:
sudo systemctl status cassandraIf successful and the Cassandra service is up and running, the output should look similar to the example below: