How to Create a Chat Room on WordPress
In this section, we will go over the steps of choosing and setting up a chat room with a plugin.
1. Pick a Chat Room Plugin That Fits Your Needs
The following are several features you should consider when looking for a WordPress chat room plugin:
- Mobile-friendliness – ensure a consistent user experience across desktop and mobile devices.
- Multiple chat rooms – make chat room channels for members with specific interests.
- Chat moderation – control user behavior in the chat room, such as filtering bad words and banning or kicking users.
- Customization – change the chat room theme, font, and background color, making it more appealing to members.
- Backup – secure chat history containing valuable information, such as feedback and media files.
If you need help deciding on the plugin, go to this article’s section covering WordPress chat room recommendations.
2. Activate and Configure the Plugin
Once you have picked your preferred chat room solution, head to the WordPress admin dashboard and install the plugin.
First, configure its settings so the plugin works properly. To demonstrate, we’ll use the Wise Chat plugin. We’ll show how to configure the General and Messages Posting settings.
To access the plugin settings, navigate to Settings → Wise Chat Settings. On the General tab:
- Go to the Chat Access Settings section and select Disable Anonymous Users to limit the chat participants to registered users only.
- Scroll down to the Chat Opening Hours and Days section. Select Enable Opening Control to specify when the chat is available for users.
- Save the changes.
After that, navigate to the Messages Posting tab and follow these steps:
- On the General Settings section, define the length of messages a user can send by filling out the field. The default value is 400.
- Go to the User Notifications section and add notification sounds to several events, such as new messages, online and offline users, and username mentions.
- Navigate to the File Attachment Settings section and choose whether to enable the file-sharing feature. If yes, decide the allowed file extensions and size limit.
- Save the changes.
3. Add the Chat Room to a WordPress Website
You can add the Wise Chat plugin to your website via a shortcode and a widget. Here is how:
Shortcode
- Navigate to Posts → Add New to create a new post.
- Open the block inserter tool and look for the Shortcode block. Alternatively, type /shortcode to quickly add the block in the editor.
- Type [wise-chat] in the text field.

4. Publish the post to save the changes.
Widget
- Go to Appearance → Widgets.
- Click List View and choose a widget from the list. For instance, we used the Right Sidebar widget.

- Select the Add Block button and insert the Wise Chat Window block.
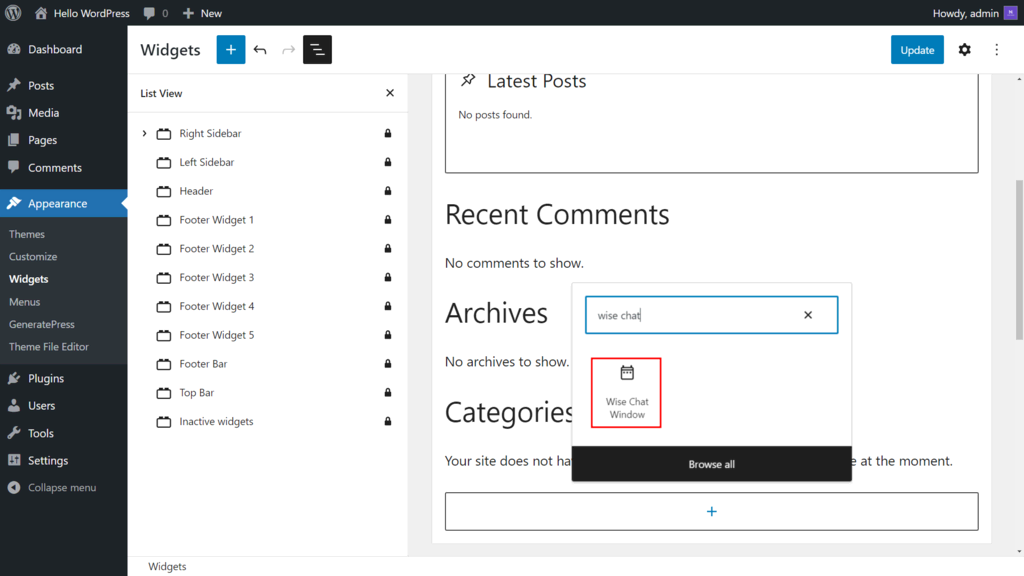
- Click Update to save the changes.
4. Customize and Test the Chat Plugin
You can modify the chat appearance to fit your website’s theme or design. Here are the steps to do it using Wise Chat:
- Open Wise Chat Settings and click Appearance.
- On the Chat Window Appearance section, choose a theme from the dropdown list. Then, modify the background and font color and specify the font size.
- Go to the Message Appearance section and set the message date and time format. Select the Username Display Mode option and choose Link to page.
- Save the changes.
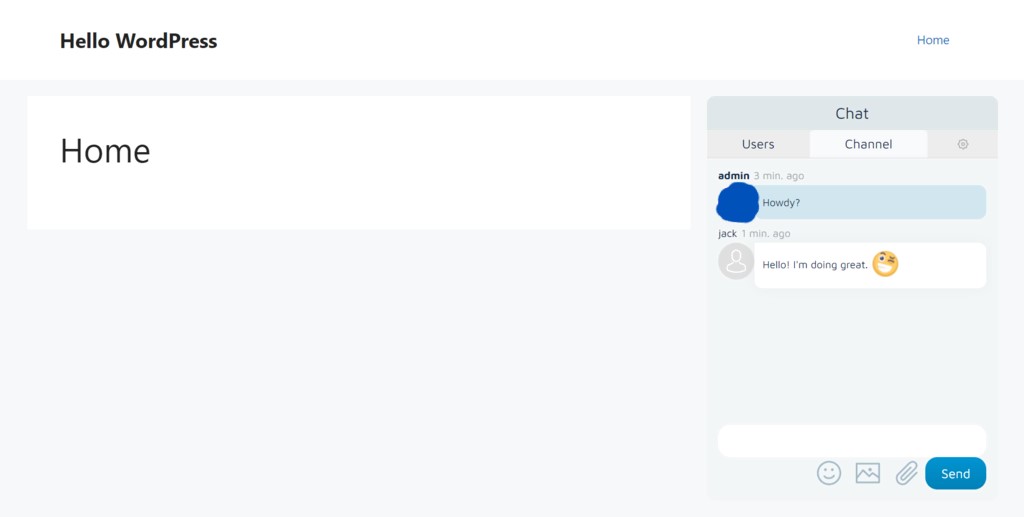
Finally, test the chat room to check if it works as expected:
- Open an incognito or private browsing tab and visit your website.
- The chat room window should appear depending on where you insert it.
- Try sending text messages and uploading media to the chat room.